Friday, July 31, 2009

It's a matter of ......Powdered Cheese


(Image courtesy of www.padutchfineteaspices.com)

One of the most frequent questions that I hear has to do with Food Storage types of "powders". Folks say "What in the world do I do with them?" They include things like shortening powder, butter powder, margarine powder, etc. Actually, in the Food industry, these powders are used often, particularly in prepared mixes. Today, I want to talk about Cheese powder. Commercially, you most likely have seen or used Powdered Cheese if you have purchased Potato Au gratin mixes or Macaroni and Cheese mixes.

Cheese powder comes in different qualities. The first type that I purchased a number of years ago looked really, really orange and was almost florescent. You all know what I mean. When I tried to make sauces with it, it was still really, really orange, and not in an appetizing way. I avoided it for a while, but got the courage to purchase more and try it again.

I went to Crane's Kitchen Kneads on Redwood Road in Salt Lake City. They sell the powder by the bag (clear plastic). That was very important to me as I wanted to "see" what kind of powder it was....I was avoiding the really orange type. The type of powder they sell is white in color, and it makes a wonderful sauce etc. It does get more color when you cook it. If you wish to see what it is like, get the "big" brand-named Mac and Cheese and look at the powder in the package. It is white. The taste is mild as well. I have come to really like it and wanted to share some ideas of what to do with it.

Nitro-pak (http://www.nitro-pak.com/) recommends the following directions for use: Gradually combine cheese blend with hot water. Stir together until smooth and creamy. Spread: 3/4 C. Water, 3/4 C. Powder. Yields 1 Cup. Sauce: 1 C. Water, 1/2 C. Powder. Yields 1 Cup.

Let's start with something really simple....Cheese Popcorn. Here is a recipe courtesy of http://www.thespicehouse.com/:


Cheese Corn Notes: (This recipe was provided by Evelyn Dybzinski).
Ingredients1/4 cup popcorn kernels
1 can butter flavor spray
1 jar cheddar cheese powder

Serves / Yields1/4 cup popcorn makes large bowl

Preparation Instructions
As the popcorn comes out of popper, spray the pan spray on it in spurts. When the bowl is full, sprinkle cheddar cheese powder on top. It will fall through and stick to the spray. Great!
(Evelyn states the following: "I use the cheddar cheese powder on my air-popped popcorn to save on calories. Also, I've found the butter flavored pan sprays help it to stick to the popcorn--again less calories").


Here is another "doable" recipe that comes from http://www.pioneerthinking.com/:


Cheese Sauce Mini-Mix

1/3 cups dehydrated cheese powder
3 Tablespoons powdered milk
3 Tablespoons dehydrated butter powder or margarine powder
3 Tablespoons flour
1/8 teaspoons onion powder

Cheese Sauce
Combine:
1 cup hot tap water
1/2 cup Cheese Sauce Mix (above)
Bring to a boil stirring with a wire whisk -- it only takes a minute! For a touch of color add a few parsley flakes (optional). Mix-A-Meal Cookbook, by Deanna Bean and Lorna Shute, p. 46.

Here are several favorites that use Cheese powder when you purchase them as mixes from the store. The information comes from http://bulkfoodmarketplace.com/uploads/RECIPE14.pdf

MACARONI & CHEESE
1¼ cups uncooked macaroni
¼ cup cheddar cheese powder
¼ cup milk
¼ cup butter or margarine
Cook macaroni in 2 quarts boiling water until tender.
Drain. Add cheese mix, milk and butter; stirring
gently until noodles are well coated.

AU GRATIN POTATOES
(Using Dehydrated Potatoes)
¼ cup cheddar cheese powder
1 tbsp dehydrated onion flakes
¼ tsp baking soda
1/8 tsp celery seed
1/8 tsp garlic powder
3 cups dehydrated potatoes
2 cups boiling water
2 tbsp butter or margarine
2/3 cup milk

Mix together first five ingredients. Place dehydrated
potato slices in casserole. Sprinkle dry ingredient
mixture over potatoes, then add boiling water and
butter. Stir until butter is melted and sauce is
smooth. Stir in milk. Bake at 400°F for 30-35
minutes until potatoes are tender.

USING FRESH POTATOES: Peel and
slice 3 medium potatoes and place in casserole.
Heat milk and butter until warm. Add dry
ingredients; mix until smooth. Pour over potatoes.
Bake at 400°F for 45-60 minutes until potatoes are
tender.


Finally, you can use it as a sprinkle on Baked Potatoes, or put some into biscuits. Experiment with it today. Take the opportunity to gain a new skill!

Thursday, July 30, 2009

It's a matter of .......preparation

(image courtesy of www.ksax.com/)
What do you think this might be? Old candy from under the car seat? Pebbles on the road?


"No" to all of the above. This is what the H1N1 Virus looks like. It looks pretty benign, but it isn't. Here are some recent stats from Utah (Courtesy of Intermountain Healthcare):


Public health is reporting:


292 hospitalized cases of Pandemic A (H1N1) flu, 14 new cases have been reported to public health since July 15, and only 6 cases had onset of symptoms in the past week. (Note: there may be a delay in reporting some cases to public health).


16 individuals have died (one in the past week).


Influenza-like illness (ILI) rates in Utah for the last week are below the epidemic threshold.


At this time, all indicators suggest that the outbreak has declined in Utah.


Risk factors:
People at highest risk of illness from pandemic A (H1N1) influenza include:
People between the ages of 5 and 44 years
Pregnant women
People who are obese or morbidly obese
People with chronic lung or heart disease.


This may not seem like a big concern today, but 14 cases reported since last week? Do you need more information? Consider the following information. The following link takes you to a fact sheet for more information and what you should do if you are exposed to H1N1 Virus: https://kr.ihc.com/ext/Dcmnt?ncid=520652641


The Autumn will be upon us very soon, which reportedly is the time when we most likely will see a resurgence of H1N1. Take the opportunity to look at the supplies you might need should a family member become ill. Prepare for a possible quarantine. This actually occurred in the East this past spring.


Elder L. Tom Perry in the October 1995 General Conference:

"I believe it is time, and perhaps with some urgency, to review the counsel we have received in dealing with our personal and family preparedness... We have been instructed to follow at least four requirements in preparing for that which is to come. Gain an adequate education, Live within your income, Avoid unnecessary debt, Store a reserve of food and supplies... As long as I can remember, we have been taught to prepare for the future and obtain a year supply of necessities. I would guess that the years of plenty have almost universally caused us to set aside this counsel. I believe the time to disregard this counsel is over. With the events in the world today, it must be considered with all seriousness."

Saturday, July 25, 2009

It's a matter of.....making Yogurt from Powdered Milk


You may be wondering why I would think this is a good thing to do when Yogurt is relatively inexpensive at the Grocery Store. Well, let's take a look at it.


Originally, I was wanting a recipe to make yogurt at home as the Rooster of the house eats 2 servings of Raspberry (and it has to be Raspberry) yogurt every day. So, you can see that this is a common item on the shopping list.


When I began to research it, most recipes call for fresh milk and a few have fresh milk with some added Powdered Milk. Since Powdered Milk is a staple in Food Storage, I was looking for a recipe that would use this instead of fresh milk.


Peggy Layton has amazing cookbooks that she publishes. I looked at 2 recipes that she published for making yogurt in two different books authored by her. In the first book Cookin' with Powdered Milk (copyright 1994), she suggests using Instant Powdered Milk. In Cookin with Home Storage, (copyright 1998), she suggests using "dry milk". A third recipe by Ms. Layton recommends non-instant Powdered milk, flavored gelatin, and evaporated milk. I tried the 3rd recipe, and it set up about half-way. Please know that I could have unknowingly done something wrong when following her recipe., but it just didn't work when I tried it and I only tried it one time.


Well, I was pleased to see a post on http://preparednesspantry.blogspot.com/. It was entitled Yogurt & Cream Cheese Using your Powdered Milk (Post dated 7/2/09, submitted by "Lynn" from Canada). Aha! I thought, maybe this is a recipe I can't mess up! So...I tried it (see below) Since the recipe is posted online already, I will list the recipe here:

YOGURT BY THE GALLON


Ingredients:


4 Cups Dry Milk Powder

4 Quarts Warm Water
1 Cup Starter (buy plain yogurt from the Grocery
Store)

Optional compliments (freeze-dried fruit, jam, vanilla
etc)


Preparation: Mix the milk powder with the water in a blender until smooth. Heat mixture to a scald over stove top in large pot or in a crock pot (not too hot or it will kill the yogurt's live culture). Watch so it doesn't burn if you are doing this on the stove top. Cool to room temperature (lukewarm to the touch with your finger in it counting to 10. Or if you have a thermometer...till it reads about 120 degrees F).


Add the following and mix well: 1 Cup starter (plain yogurt or freeze dried yogurt starter or saved yogurt from your previous batch - this needs to be renewed after a month or the taste becomes sour).


Put into a gallon glass jar with a lid and place in some kind of hotbox (wonder box or thermal box) in a warm room for 12- 14 hours until thickened. If you don't have a hotbox, leave it in your crockpot, unplugged, and wrapped in a large towel to keep warm. You can also put it in a cooler wrapped in warm towels.


Once thickened: Refrigerate up to 12 hours. May need stirring before use. It does thicken more as it is refrigerated. You may add freeze-dried fruits, jam, or a bit of vanilla for flavored yogurt. However, remember to set some plain aside first if you are going to use it as a starter for the next batch. Hint: Freeze your remaining purchased plain yogurt in ice cube trays to have on hand for the next batch's starter when needed. Good for 6 months in the freezer.


I decided that a Gallon would be way too much for our family. So I cut the recipe in half. Well, here is how it went for me:


I choose to use jelly jars to put the Yogurt in as this is about the same serving size as the purchased yogurt containers. I put the jars in my dishwasher and sterilized them.


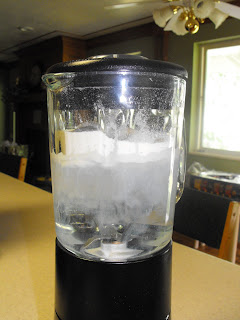
As per the instructions, I mixed the milk in my blender. Be careful not to make it "foamy", just stir it.


I put it in a pan to scald the milk and I watched the thermometer. When the temperature had been reached, I let it cool in the pan.


If you remember, only "Raspberry" yogurt is eaten in our home, so I put some of my Raspberry Jam in the jars. I have seen video's where the jam is carefully spread along the bottom....I figure it will get stirred up in the yogurt when it is eaten, whether it is on the bottom, or sort of on the bottom.


I used a funnel to put the milk solution into the jars. I put on lids (which do not have to be new. This is a great way to recycle your lids....just make sure they are very clean) and the rings.


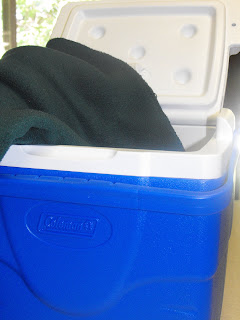
I took a fleece blanket and put it into a cooler.


Place the jars into the blanket lined cooler. Cover with the blanket and close the cooler. Keep the Yogurt in the cooler for 12-14 hours. I did this in the morning, and by the evening, I was able to remove them from the cooler.


I tilted the jar when I was taking it out of the cooler to see if it had "set up". It had.


I then put the jars in the Refrigerator. I left them there overnight.


Here is what it looked like when I opened the jar about 12 hours after putting it into the refrigerator.

So....what did the Rooster think? He said it was very good, but it tasted a little different than purchased Yogurt. Perhaps this is why many of the recipes suggest putting a little Jello powder in the mix. It helps color the yogurt as well as flavor it. I will be trying that next time.

How much does it cost. I figured it cost just under $.17 per container (1 cup) as compared with $.50 to $.69 cents for a similar sized container at the grocery store.

Finally, I am glad to know that I have a recipe that I didn't ruin! It really worked and really only took minutes to make. The hardest part for me was waiting for it to be done! Those of you who know me realize what a challenge waiting is for me!

TRY IT TODAY:)

Friday, July 24, 2009

True to the Faith......

Today, particularly in Utah, the members of the Church of Jesus Christ of Latter-day Saints will celebrate the commemoration of the arrival of the Pioneers to the Salt Lake Valley. It will be a day with parades, family gatherings, and parties. However, let us take a moment to remember the great sacrifice of those who gave all they had for their faith. Let us be grateful....


Thursday, July 23, 2009

Using a Dry Pack Canner...at home!

Last year, our ward had a great Enrichment meeting showing us all how to use a Dry Pack Canner that you can check out from our stake or from our local Home Family Storage Center (often referred to as "The Cannery"). Well, if you need a refresher course, here it is. Enjoy!


Food Storage Analyzer from Emergency Essentials


Previously, I mentioned that Emergency Essentials has a new offering called "The Food Storage Analyzer". This is a free tool to help you know what you actually have on hand and to plan out future purchases that you may need.
The steps are relatively easy (taken from their blog):

  1. Create a Login: This allows you to save your data
  2. Fill in your current food storage inventory
  3. View and analyze the calculations
  4. Determine what your future purchases need to be. You may even play with it to ad or subtract potential items that you may wish to obtain.

To sweeten the deal they have a promotion going at their blog "The Preparedness Pantry" Here is the information regarding this offer directly from their website:

In celebration of our revolutionary new Food Storage Analyzer™ (currently in beta version) we are having another fantastic giveaway! This time around, you have the opportunity to be entered twice for a chance to win a case (6 - #10 cans) of our famous Freeze-Dried Strawberry Slices (regularly sold for over $140.00).

Just go to http://preparednesspantry.blogspot.com/2009/07/food-storage-analyzer-giveaway.html to participate. Good luck!

Great article from "The Dollar Stretcher.com"


I subscribe to a number of online newsletters. I have several from http://www.stretcher.com/index.cfm that I read. Because they come via email, I can read and glean from them and finally delete them without any paper to deal with. I love email!

Here is a link to a recent article on storing food. As you will see Food Storage isn't just for members of the Church of Jesus Christ of Latter-day Saints any more. The article talks about expiration dates, how long items can store, and other ideas etc. The author "Barbara" is a very smart "Chick". Enjoy!

Sunday, July 19, 2009

It's a matter of...... storage space


No, this is not a "Where's Waldo?" picture, but it could be. What is "different about this picture?" Are you not sure? Look closer....


Can you see it now? I recently went to help my sister move into a new home. They do not have a basement or attic to put their food and due to the climate, the garage is not a great place for year-round storage either. So, this was my sisters brilliant idea...


These are Bed Risers (that were purchased from Wal-mart for just under $9.00 for a set of 4). You can see that they elevate the bed high enough to put #10 cans and cases under the bed! We all have heard that you "could" put Food Storage under your bed, but I personally pictured the bed made from Food Storage in the movie "R.M.". As you can see, this is nothing like that "food storage" bed.


How many cans can be stored under a queen-sized bed? Let's see:


The head of the bed is to the right in this picture. After counting, we were able to store 104 number 10 cans under this queen-sized bed. If you are worried about "how it looks" after you are finished, you need to elongate your bed ruffle to mask the storage. The bed is not that much higher as I easily got in and out of another bed that she had on risers.....and I am short!


The next logical question may be....."Won't you forget what you have under there?" The answer is "no". Why, you ask, because you create a log/map of what and how much you have under the bed. See the photo below:


This isn't rocket-science. A piece of line paper does the trick.


So, when you think you don't have room to store your Food Storage, consider this option. It really works!


Happy Birthday to...."Music & The Spoken Word"


The following information comes from the Mormon Tabernacle Newseletter dated July 17, 2009. Happy 80th!!!!!!

80th Anniversary of Music and the Spoken Word

It was on a Tuesday about midday on July 15, 1929 when the first radio broadcast of the Mormon Tabernacle Choir took place. The originating station, KZN, predecessor of today’s KSL, went off the air temporarily so that its only microphone could be carried across town and suspended high in the Tabernacle to pick up the sound of the Choir.

Ted Kimball, the first announcer for the program, stood atop a ladder the entire 30 minutes to announce the numbers on the program. The program was aired to 30 stations around the country and was well-received. That was 80 years ago and Music and the Spoken Word has been aired every week since, becoming the longest continuous network radio broadcast in the world.

Several celebrations mark the 80th anniversary. On Wednesday, July 15—the exact day 80 years ago of the first broadcast—the Choir and Orchestra at Temple Square performed a concert at the Dee Events Center in Ogden, Utah. Dubbed the “8th stop” of their recently concluded Central States Tour, the concert was also a celebration of the 75th Anniversary of the Ogden Rodeo Days.

On Friday, July 17, the annual Pioneer Day Commemoration Concert held in honor of the arrival of the Mormon pioneers in 1847 will honor the pioneering broadcasting efforts of the Music and the Spoken Word broadcast. The Choir and Orchestra will perform music from their recent tour program plus other songs interspersed with video and narration about the Music and the Spoken Word broadcast over the years.

Finally, on Sunday, July 19—the actual conclusion of the 80th year of broadcasting—a special ceremony will be held following the landmark broadcast featuring remarks by Thomas S. Monson, President of The Church of Jesus Christ of Latter-day Saints; Bruce T. Reese, CEO of Bonneville International, distributor of the broadcast; Choir President Mac Christensen and Music Director Mack Wilberg. The anniversary will conclude as it does each week with the Choir singing “God Be With You Till We Meet Again.”

Friday, July 17, 2009

She's baaaaaack!

I have posted this lady's Dehydrating videos before....because she does such a good job. These videos discuss dehydrating frozen vegetables and fruits. You may be thinking "why?". Well, the blanching has already been done for you, and these items go on sale relatively often so it saves you money. It also saves you the time of cutting, peeling etc. Also, it also saves your valuable freezer space!

I recently taught a class on Making mixes from your Food Storage staples. One of the items I displayed was Vegetable soup in a cup. If I had purchased all the dehydrated vegetables for this, I would have spent a pretty penny doing so. If I had dehydrated all of them, it would have been a significant investment of time. However, a bag of mixed vegetables placed in my dehydrator provided the vegetables I needed for the mix....and it worked very, very well. So listen to this "smart chick", she knows a lot about what she is doing!


Price Reductions......

(Image courtesy of www.treehugger.com)


I recently learned that the prices of some Food Storage staples have come down at the LDS Home Storage Center. In particular, bulk oats, dry milk, dehydrated apple slices, and rice. Other staples have risen in price. Locally, you can purchase these staples at the Lindon Family Storage Center. It is open on Tuesday and Thursdays. Just follow the steps below:
  1. Download the order form. You can fill it out electronically and sign it electronically if you wish, or just print it out and complete it by hand. It is really your choice. You can find the order form at the following link: http://www.providentliving.org/pfw/multimedia/files/pfw/pdf/120974_HomeStoragePriceSheetSpring2009_pdf.pdf
  2. Call the Lindon Home Storage Center at (801) 785-0997 to make an appointment. If you wish to purchase bulk items, please still call beforehand to ensure they have the bulk items you are seeking at that time. The location of the Home Storage Center is 940 West Center, Lindon, Utah.

Thursday, July 9, 2009

Preview of the upcoming class on July 16, making mixes from your food storage staples.

I love this lady. I have learned a great deal from her. Her video is a preview of the types of things we will learn on July 16th......but a Food Saver is not a requirement!

Enjoy this video....she really is a very smart chic!

It's a matter of keeping foods fresh!

(image courtesy of thefreshlife.com)
We have all been there. We open the vegetable drawer in our refrigerator....and find what appears to be a left-over science-fair project. It frustrates me to throw food away, not to mention the loss of the investment.

In the past few months, I have been using the "green bags" that I have found reasonably priced at Big Lots and other big box stores. I am amazed at how much longer my produce lasts. I am a believer of the "green bag" thing.

I recently have heard of "Oso Fresh" Food Containers. They are sold commonly at price club stores. Here is what their website states:

Oso* Fresh™ Food Storage Containers are infused with EPA registered and FDA approved micro-sized silver particles which are proven to reduce bacterial growth and keep food fresher. While the silver particles keep bacteria out, the easy-to-open snap on lids keep freshness in.


Stackable units nest into one another for easy storage.
Microwave, freezer and dishwasher safe.Revolutionary airtight silicone-gasket locking system preserves flavor while effectively reducing food spoilage. The effectiveness of silver was shown in laboratory tests to reduce bacteria by over 99% over a 24 hour period. Micro-sized silver particles are EPA registered and FDA approved.


Keeps food fresher 3 to 4 times longer than the leading competitor. Stop wasting food and start saving money with oso*fresh containers.

You can view an informational video and as well as purchase these containers at: http://www.thefreshlife.com/index.php?main_page=index .

Make your own mixes from Food Storage Staples....July 16th!

Yes, I did already posted a "save the date" post a few days ago about the class that will be on held on July 16th at LRH's house.

But, I have learned something new! I see in our community that a fraction of the information planned for this class will be taught by "others" in 2 different classes in our area and that there is a fee of $20.00 for each class to attend. The screaming deal is here in our ward! No fees, great company, and you will learn how to save time and money! Save the date...and come!

I have learned so much about making spice mixes, baking mixes, main dish mixes, side dish mixes, breakfast mixes, etc. Most of them are made from Food Storage staples. The above picture is an example of what we will learn. It is a mix that is equivalent to 9 cans of condensed cream soup....without the fat! It costs nearly one-fourth the cost of purchasing the cans and certainly takes much less space.

This class helps answer the question "what do I do with all of this stuff?". Put the date on your calendar and come!

Thursday, July 2, 2009

It's a matter of .....Coupon"ing"

A picture of a coupon for Undercover Bears Oat...Image via Wikipedia


Yes, I said it......the "C" word. Until recently, most people could care less about Coupon cutting and actually using them. I have been told this by several folks in my area. However, the times are a changing....and people are changing with them.

A couple of years ago, I attended the Couponing class taught by "Amy" from the Daily Herald (published in Provo, Ut). I had every intention to bring her to our area and have her teach the secrets to her success.....but after mentioning this to several folks, only one was interested!

Well, I see more people using Coupons at the checkout stands....and the line takes just a little longer because of it. This does not bother me, it shows that those individuals are being proactive....something that LRH truly admires.

I recently found this Powerpoint presentation on Couponing. You may find it of interest. If you do, consider attending "Amy's" class that she traditionally teaches at the Orem Macey's Store. Check their website to find the dates, they have had several of these classes in the past few months. Happy clipping!

http://www.macserv.com/filechute/Couponing101.pdf

How to build your own Can rack (that rotates cans)

Like most of you, I have eyed the wonderful commercially made rotating can racks. They are so great!. However, sometimes the price isn't as great as the device.

Sooooo, some very smart chicks have a plan to make them out of a cardboard.....So smart!


You can find the instructions and photos to make this yourself at the following link: http://foodstoragemadeeasy.net/2009/02/16/build-your-own-can-rotating-rack/

It's a matter of Dehydrating Peppers

Bell PeppersImage by Let Ideas Compete via Flickr


Not too long ago, the LRH came across a sale on Peppers. It was not only Green Peppers, but Orange, Red, and Yellow. I bought a bunch! I then prepared them as follows and dehydrated them. They are great to use in casseroles, when making Salsa, Burritos, or anything else you can think of !


Here are the steps to dehydrating them. First of all, you do not need to blanch them. I cut them in half, and removed the seeds.


Next, I cut them into strips and placed them on the tray. Place the trays in the dehydrator and check periodically to see if they are dehydrated to your preference. I would recommend that you place your dehydrator outside because of the strong aroma. (As you can see, there is nothing that requires a Rocket-Scientist yet!)


This is what the Red Peppers looked like after they were dehydrated.


Look how beautiful they look after they are dehydrated!


If you were to purchase Pepper Flakes from your local Grocery Store, you most likely would pay between $3.00 and $7.00 for just over 1-2 ounces. I got nearly 18 oz (after dehydration) for about $10.00. If that isn't worth just a few minutes of your time to slice them up, I don't know what is. Try it!

It's a matter of ......Freezing foods to preserve your investment

'SeveralImage via Wikipedia


In an earlier post, the LRH discussed "Flash Freezing". I use this for my berries and some fruits like bananas. After freezing, I then take them off the cookie sheet and place them into a freezer-safe bag. I can get as few or as many as I need from the bag when I want to use them.

I recently came across this video which not only briefly shows "Flash Freezing", but also discusses how to safely freeze food in general. It is done in an entertaining fashion...and I learned a lot.

What I learned that was surprising to me is that food that has Freezer burn is still safe to eat. Whether you would want to put it into a stew, or use it in some other way, it reportedly is safe. Enjoy the show....and learn a lot!


Reblog this post [with Zemanta]


01 09 10