Showing posts with label Gifts. Show all posts

Sunday, July 24, 2016

Raspberry Jam made with Clear Jel....

#amatterofprep

Yes, it is glorious Raspberry season again.  I look forward to fresh Raspberries to eat in salads, alone, and certainly in Jam!  Don't you just love fresh Raspberries?

Making Raspberry Jam with Clear Jel:

I have many folks visit my blog to learn more about using Clear Jel.  I wrote a post about making many different Jams using Clear Jel a few years ago.  Even now, this post gets a great deal of attention this time of year.  I have used it to make Salsa as well.    Additionally, I have used it in canning Pie Fillings  because unlike cornstarch, it does not separate and break down the gel portion of the pie filling.

Well, Rooster Senior likes Raspberry jam a whole lot. So, I got busy and made some Raspberry Jam:

#amatterofprep

The recipe calls for crushed berries. I use my potato masher/ricer.

#amatterofprep

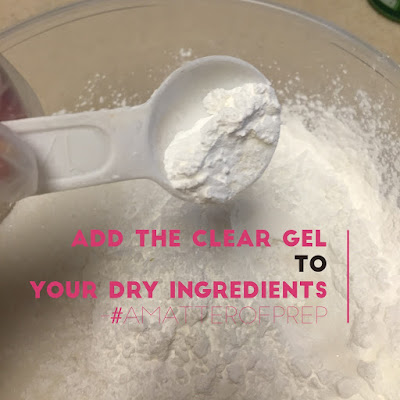
Instead of using the standard Pectin products that require copious amounts of sugar, you will use less sugar when you use a recipe that requires Clear Jel.  The secret to success is to mix your Clear Jel to the dry ingredients first.

#amatterofprep

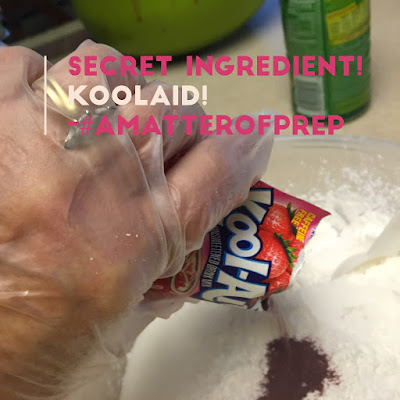
Although the recipe that will appear at the bottom of this post does not call for Koolaid (per the author), please consider adding a packet to each batch.  It really enhances the flavor.

#amatterofprep

Mix the dry ingredients to the heated berry mixture slowly.  Bring to a boil.

#amatterofprep

Ladle your mixture into clean/sterilized jars.  There is some discussion about whether jars need to be sterilized.  I choose to error on the side of caution. Process per the directions in a Hot Water Bath. 

Would you like the Recipe?


Berry Jam4 cups crushed berries or juiced
1/4 cup lemon juice
7 tablespoons Clear Jel®
Sugar to taste (approximately 1 1/2 cup)
Add lemon juice to berries. Combine Clear Jel® with 1/4 cup of the sugar. Add to berries. Bring to a boil, stirring constantly. Add rest of sugar. Boil for 1 minute, stirring constantly. Pour into jars, leaving 1/4” headspace. Process 10 minutes in boiling water bath or freeze.

(Don't forget to add the Koolaid, it is really delicious!)

Take Home Points:

  • Clear Jel is shelf stable and according to my research lasts indefinitely.  Compare that with traditional products that are used to make jam. 
  • Jam recipes calling for Clear Jel often use nearly half of the sugar that traditional jam recipes call for.  
  • When added to dry ingredients, it mixes well and give the jam a wonderful consistency.
  • This is a simple recipe that does not take a lot of time.  
  • Rooster Senior has already polished off one jar. Rooster Junior took a jar, and I have 2 to the neighbors already.  The magic or jam brings smiles to all those who receive it!

Where do you purchase Clear Jel?

If you use a Search Engine like Google/Chrome to find Clear Jel, be sure to click on the "Shopping" option at the top of the page. You should see many options to purchase this product.  I have purchased mine locally from a little shop in South Salt Lake that declines to get a website.  Alas I would give you a link but there is none.

Try it!


Saturday, December 19, 2015

It's a Matter of an Easy Neighbor Gift!


Are you finalizing your Christmas plans only to find a few friends who may not have made the list?  If so, here is a fun and easy gift you can put together rather quickly!

Making a Treat Bag from a Dish Towel:

I saw this gift option at my local sewing store.


The instructions are published by Brother.


I am blessed enough to have a  sewing machine that can do Machine Embroidery.  The Instructions from Brother direct you to embroider your design near your hem border.  If you do not have such a machine, you could cut a square of holiday fabric and applique it to the towel.  The design that I chose is an "Anita Goodesign" entitle "Christmas Pot Holders".


Fold up each edge and sew along the sides (at the 8" mark) with "Water Soluble Thread" in the needle and traditional thread in the bobbin. 


Next, open the corner of the towel and sew across it to form the corner (at 3 and 1/2 "). Press.


Using Safety pins, secure them from the inside of your Treat bag on the back and sides.  Turn the bag inside out and thread your ribbon through the 'loops'. 


Place all your fun goodies in the bag. I am including Bread (made from my Bread maker), Hot cocoa packets and a couple of ornaments for the recipients.


Bring the flap down over your treats and tie it up with the ribbon you have threaded through the safety pin loops.

The Instructions from Brother included a poem that should be attached. I didn't particularly care for their version so I decided to get poetic and write poem. 

"As we celebrate this Christmas Season
Let's remember that He is the reason.
He gave us life and the gift of choice.
He gave us redemption that we may hear his voice.
Like the gift of forgiveness, this bag can transform 
Just wet the seams to give it a new purpose to perform.
A towel will emerge where a treat bag once was
To serve you and yours, have a  Merry Christmas!"


Merry Christmas From Our Family To Yours. 

Sunday, June 14, 2015

It's a Matter of Raggedy Ann...... and a Sweet Gift for a Precious Little Girl

A Matter of Preparedness

Aren't these so sweet?  These were gifts for a sweet little family member who just turned 1! I have always made Raggedy Ann Dolls for my little family members, and hope that they will be a keepsake from the Rooster Senior and I.

When I give these to sweet little family members, the adults often ask me how I made the hair look so good.  

A Matter of Preparedness

How To Sew Hair on a Raggedy Ann Doll....

See how tight and thick it is?  I have never liked the directions that come with the pattern that basically ask you to tie a knot and leave short pieces of yarn to make the hair.  I feel like a Raggedy Ann with hair like that looks like the doll needs a hair transplant.  Sooooo, would you like to see how it's done?

A Matter of Preparedness

First, I wrap yarn around my hand until I have a 'clump' that looks about like this. Clip the clump of yarn from the skein.

A Matter of Preparedness

The pattern that you can purchase comes with an iron-on transfer to help you see the lines the hair should be sewn upon.  Lay the 'clump across the line and sew a straight stitch through the middle.

A Matter of Preparedness

This is how the hair around the face will look when you have finished sewing around the iron-on transfer line.

A Matter of Preparedness

In order to sew on all the lines on the back of the head, you will need to hold the hard out of the way with your fingers.

A Matter of Preparedness

This is what the back of the head looks like after sewing on all the iron-on transfer lines.  Look how curly and thick it looks.  

A Matter of Preparedness

Now this is where you have to deviate from the pattern's instructions.  Because of the bulk of the yarn, you will need to pin the back and front pieces together and most likely sew them together by hand.  I use a back-stitch and double-knot it on either end to hold the pieces together.

Next, you turn the head inside out.  Here is the most challenging part of the head and hair.  It will be a little difficult to turn it inside out. I have found starting at one side and carefully turning it inside-out is most helpful.  Halfway through the process, the whole thing will pop around and you will be good to go at that point.

A Matter of Preparedness

Now, you can see that I have two different faces on the dolls in this post.  Most of the dolls I have embroidered by hand.  However, I downloaded the pattern for the face for my Embroidery Machine at the suggestion of my good friend.  I still am undecided which I like better.  As of late, I have been embroidering the name of the little recipient on the Apron as well.

A Matter of Preparedness

I chose to make a little sleeveless dress to match.  This can be worn year-round either as-is in the summer or with a long sleeved blouse in the winter.  I also wanted to point out the flower.  I cut the flower just under the umbel and hand-sewed the flower to the rough side of Velcro.  I sewed the companion smooth side of the Velcro on to the ribbon running across the bodice of the dress.  Sewn this way, the flower is removable for washing.

A Matter of Preparedness

Last, but certainly not least, is the headband.  Honestly these are very simple to make but it sure adds another level of cuteness to this outfit.  I used a ladies knee-high and tied the ends together in a knot.  I then hand-sewed the flower on. These are silk flowers so you can push a needle through the silk petals.

A Matter of Preparedness

This is the end result....and aren't these items just so sweet?  It didn't take too long and this little one and her Momma seemed to really like the doll (and the dress).

Take Home Points:

  • Sewing is a useful skill.  To purchase a Raggedy Ann doll costs about $30.00 on-line.  A similar dress on-line also runs about $30.00. The fact that they are matching would increase the price as well.  I hate to admit this but I made all of this for under $18.00.
  • The doll only requires straight stitching. The Apron takes some zig-zag stitching for the gathering. These are very, very basic stitches that even the most inexperienced sewer can do.
  • The enjoyment of this little one can not be measured.  It was also very fun to be so creative. 
  • The pattern for the doll can be purchased on Etsy for $4-10.00.

Try it!


Monday, January 9, 2012

It's a matter of a Crocheted Headband....so easy to do!


Believe it or not, I made this Knotted Crocheted Hairband in about 30 minutes.  It was inspired by a post at "You Seriously Made That?". I wore it to church, and got compliments from the Young Single Adults.  I was pleased and surprised.  Also, I am not too proud to say that the pictures in the "You Seriously Made That?"  blog tutorial are much better than mine.  It is difficult to admit defeat, but in this case...you may want to follow her directions until you get to the section on attaching the ribbon..  I made an adjustment to this hairband, which I will show you later.


I made this entire thing from materials I already had.  I love when you can do that, don't you?  Here is my attempt to show you how to do this:


Single Crochet 2 chains.  (You will need a H or a J Crochet Hook).  One chain will have 160 single chains stitches and the other will have 300.  Fold each chain into thirds.


Now, I am going to introduce some 'abbreviations' to help with this process. "LC" means 'long chain' and "SC" means 'short chain'. The letter "R" means right and "L" means left.  So, when combined, "LCR" would mean 'Long chain right side' etc.

Take the LC and make a look with the LCR over the LCL.


Place the SC in a semi-circle on top of the LC.


Take the SCL and place it under the LC loop.


Take the SCL and place it over the LC loop.


Now, don't get lost here.Take the SCR, go under the SCL and over the LC loop.


Pull the ends to make a beautiful knot.


I used Grosgrain ribbon, but you could use Satin ribbon if you chose to. Cut two 15" lengths and two 4" lengths of your ribbon.   Here is where I depart from the method proposed by "YouSeriously MadeThat".


Instead of hot gluing the Crochet chains and the ribbon, I chose to sew them.  For me, I was concerned that the hot glue could be stiff.  In addition, if this headband got tossed in the dryer, I would be concerned that the hot glue would melt all over my clothes. Instead, I used the following method.  I sewed the 4" length of ribbon into a loop. I chose to use my Serger, but his could also be done on a traditional sewing machine.


I slipped the loop over the ends of the Crocheted chain. I slide it down nearly to the ends of the chains.


I then slipped the end of the long length of ribbon under the loop.


Lay all rows of the Chain Stitch side-by-side so that they come from the knot to the Ribbon loop in a parallel fashion.  Using a Zig-Zag stitch, I sewed across the top and the bottom of the loop.  I could have made this a Satin stitch to make it more 'beautiful'.  For me, the Zig-Zag stitch was a functional choice.


Finally, I clipped the ends of the chains just below the ribbon loop.


Here is the finished product.  Just tie it together at the base of your neck.


I was pleased with how well this project turned out, and was grateful it didn't take a lot of time.

What is the take-away here?  If you are new to Crocheting, this project is a really easy introduction, and you get satisfaction very quickly. Having completed something like this gives folks who are new to Crochet the confidence to try something else. It also makes a really nice gift!

Try it!

Sunday, August 28, 2011

It's 'Hot'.....for your kitchen!


I had a family friend come over yesterday.  She wanted help making an apron to take with her when she moved away for college. She loves the colors Orange and Green, thus the apron she made (which was reversible....Orange on one side and Green on the other), had these colors.  There were scraps left over, so I helped make 2 hot pads for her to take with her.  They were, of course, Orange and Green.  I learned how to do this from a colleague of mine, Melanie F.  Here is how you can do the same.  This is a simple project and is not time consuming.  It also uses the scraps you have on hand.


First, layout your scraps on a flat surface. These scraps are just a cotton/polyester mix. Choose a bowl that is just wider than the width of your hand with fingers spread.  Lay the bowl with the lip directly on top of the fabric.


Trace the perimeter of the bowl on to the fabric with a pencil or marking pencil.


The inside of the hot pad is made from scraps of flannel.  These are flannel scraps left over from a pajama project I had last fall.  As before, trace around the bowl.  You will need  between 4-6 layers of flannel inside the pad.


Because I love short-cuts, I just pinned the first set of circles on to the fabric and cut them out. This way, I didn't have to retrace the bowl each time.


Next, cut strips of fabric on the bias.  I used strips that were ~3 Inches in width. Cutting on the bias allows the fabric to stretch when needed.


After cutting all of these out, you should have the outside fabric circles, the flannel circles, and the bias strips of fabric to finish off the edges.


Stack the circles with one of the outside fabrics at the bottom (facing toward the table surface), the flannel in the middle, and the other outside circle on top.  Here I turned the flannel circles wrong-side out to place just under the outside circles.  If I hadn't done this, you would have seen the plaid pattern show through. Pin along the outside edge.


I then pressed the circles in half and then quarters.  This gave me guidelines to stitch across the circle. I first stitched the circles in half, then quarters, and then eighths. 


Next, press the bias tape in half.


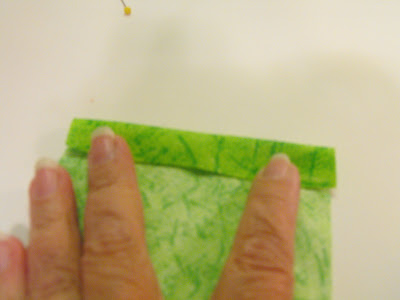
Press the edge under about a 1/2 of an inch.


Pin the bias tape around the outside edge of the circle.


Pin the raw edge of the bias tape to the raw edge of  the circle.  Stitch with about a 1/2" seam all around. Then unpin the tape.  Pull it over the raw edge, pin again, and top stitch the folded edge to the opposite side. 


Press the hot pad flat with your iron.


Here is the hot pad with the finished apron.  It's fun, easy, and very functional.  And, it's "matchy-matchy" which our young friend seemed to like.

Try it!
01 09 10