Showing posts with label Sprouting. Show all posts

Sunday, September 15, 2013

A fun "hand out" to go along with the Visiting Teaching Message for September 2013


Have you seen the September 2013 Visiting Teaching Message?  It is all about Self-Reliance.  To find the entire message, go here.

I was excited to see it.....I think the subject is pretty important!

I decided to make a little 'gift' to go along with the message.  Here is what I did:


I made really small mylar bag packets.  To find out how I do this, please go here.  


I sealed the packets on 3 sides.


See the nice seal?


I put a tablespoon of different sprouting seeds in each packet.


Make sure that you label each packet.


I chose to seal the packets with my flat iron.


Cut a piece of screen cut to fit just inside the canning jar lid.  Place it inside.


Place the packets inside of the canning jar.


Insert the directions to sprout the seeds in the jar.


Here are the directions up close. Take the lid (with the screen) and screw it on the jar.


I made a bow out of Tulle and attached this wonderful handout from "My Happy Tribe".  (I re-sized it as the original is an 8 x 10).

It took all of 20 minutes to put this together.  It gives your sister something to try right away and is very applicable to this month's lesson.

Give it a try!


Monday, January 14, 2013

It's a Matter of....Yummy Bean Sprouts....at home!


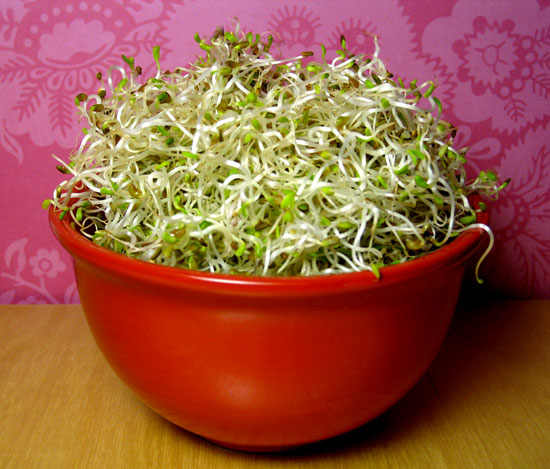
Aren't they lovely?  Yes, I am saying "lovely" about Bean Sprouts, but these look and taste great.  I wanted to show you my experiment and slight changes that I made to a method from Rita Bingham's Natural Meals in Minutes.  She gives you directions to use a 2 quart container to sprout with.  For my purposes, that was just too large, so I went looking around my house and found the following items which I used to grow these yummy sprouts.


I used a 1/2 Cup of Mung Beans and soaked them over night.  Can you see how much they expanded over night in this mug? I then found an empty #10 can, a nail, and a large clear disposable cup.


I used the name to puncture holes in the cup for drainage.


Puncture the sides and bottom.


Placed the soaked Mung Beans in the cup and place several layers of a cloth that will protect the beans, but also keep them moist. I think next time I will use Burlap as Ms. Bingham suggests.


Because I was sprouting a smaller amount, I only used a 2.5 pound weight.  This was a little tricky to find something of the weight, that I didn't care if it got wet and could fit in the cup.  Thanks to Rooster Senior, I used some of his nails for his nail gun, put them in a baggie and weighed them on my kitchen scale to calculate how many I needed.  


Layer the beans, cloth, and weight in the cup.  (I also got the cloth wet by running water over the whole unit and let the drainage holes release the excess water.  


I inverted a saucer and placed it at the bottom of the can.  This allows water to run off and reside under the plate.  This could be obtained at the dollar store if you didn't want to use your own dishes.


Place the filled cup into the can.


Here is where you get to make a choice.  You can either rinse the beans 4x/day and then keep them in the dark with a lid. (By the way, keeping them in the dark gives you beautiful white sprouts).


You can also cover them with a towel and drip water on the towel throughout the day and night.  As it is soooooo cold here right now and as one of my neighbors has had a frozen pipe issue, I chose to dripping water method.  


Now can you see why I chose a Clear Cup?  See the thick white sprouts working hard because of the weight on top?  


I could have waited another day to take them out of the cup, but I was just so curious I didn't. They taste wonderful and even Rooster Senior, who doesn't like anything that looks like a pea liked them.  He cautioned me though, only put them in salads or sandwiches.  He said that "if they were cooked, they would be too much like peas", which is a big no-no around here.  I don't think that would be the case, but it is his own reality.  I could also put them in the bread dough if I were baking bread.

If you want to see it in video form....here you go!


I think this experiment was a success, and I will do this again.  I loved the fact that I could do this with things around my home.  Also, I love the fact that I made about 2 cups of Bean Sprouts for pennies.  

Try it!

Thursday, February 17, 2011

Real Food Shortages.....and how to "Weather the Storm"


(Image courtesy of my veryworstjob.com)

I hate sounding alarms.....but we all are about to feel a huge pinch at many of our retailers.  Remember that crazy storm during the Superbowl (I didn't watch....but certainly heard about it)?  Well, it was in Texas....which is located just north of Mexico.....where a lot of our winter produce is grown. Some sources say that 80% or more of those crops were destroyed. 

Remember the Floods in Australia?  There is a lot of meat and wheat that comes from that area.  We have this interdependence on this country and others.  Sketchy reports from China state that they have had crop failures as well and their well planned reserves are down.  They usually do not draw from the world market and haven't traditionally been a concern as they often provide for themselves. (What a radical idea....).  However, they reportedly may be purchasing to build up their reserves.

Here is a local story that should get your attention.

FOOD SHORTAGE: Produce prices are expected to rise dramatically in the next few days after a freeze destroyed a huge swath of Mexican food crops. - KSTU

Soooooo, what do you do?

There are 2 things to do....and you can do them!


The first is to get out your Sprouting seeds.


And your Sprouting Trays and begin sprouting to get fresh produce.  For more information about Sprouting, please go here.


(Image courtesy of teamsugar.com)

Use them in sandwiches, soups, breads, and a salad of your own making.  Be creative.  My sister and her husband made a choice to live strictly on their food storage for a time.  She said she would have killed for a salad or fresh produce.  This is fun for your children as well.  Show them what to do in situations like this.


Start your garden now....indoors. If you look at most of your packages, in 40+ days you will have something up and growing!  For more information on how to do this, please go here.

There are options available to you......don't feel victimized at the store.  There are things you can do immediately for fresh produce.  In addition, start stocking up on foods in season, and store your meats now.  We will most likely see meat prices rise dramatically because our Poultry, Beef, etc stocks are fed....grains.

Finally, cotton has risen tremendously.  This means clothing will also be impacted. 

Just be smart.....inventory, plan, and get going!

Friday, May 14, 2010

My little inexpensive discovery.......

Those who have followed this blog for a few months may remember this little "discovery", but knowing our focus item is sprouting...I will resurrect it once again.


Well, Strawberry season is upon us, and I love seeing those full and half-flat offerings!  I love fresh strawberries, but also like to make jam.  Why are we discussing this?  Because I have discovered that those little plastic containers that the berries come in is a great and inexpensive way to sprout. 


Here is an empty container from some berries had previously purchased.


Fold a paper towel in the shape of the bottom of the container.


Moisten the paper towel with water.


Pour your soaked seeds into the container.  Let the water rush out of the weep holes.  (Do this over the sink).  Close the lid, and pull off the sticker so that light can get in when you are ready to expose the seedlings to light.

Leave on the plate and cover.  As noted in previous posts, rinse the seeds 2-4 times a day....right in the container.  If the seeds are small (like Alfalfa), just drop water off your fingers on the seeds).   When the sprouts are established, remove the towel and place in the sunlight.  Continue to rinse until you are ready to eat!

Now these "trays" do not cost a lot.  I have even sprouted in these containers and given them away as part of a gift.  They also are not "Dishwasher safe"....you just can't win sometimes.

Wednesday, May 12, 2010

More on Sprouting.........

Well, how is your sprouting coming?  I hope you have taken the 30 seconds to a minute to begin this process!  If not, start RIGHT NOW.  It is easy, and you will have success.....it's hard not to.

I often hear comments such as "You make it all look so easy".  Soooooo not.  I just don't show you all my disasters.  However, today you will see one of my mistakes....so that you can learn what not to do.  We have seen that you can spout in a canning jar.  There are also several commercial Sprouting trays you can purchase.  Let's take a look.....


Here is a readily available type of sprouting tray. It comes with 2 trays that can nest together.  However, this is not how they come.  Yes, this is one of my little catastrophes.  Why? because most commercially made sprouting trays......


are not.....


Dishwasher safe!   So, this really is not a usable tray for me any longer.  Thankfully it is very inexpensive (usually under $15.00).

Let's look at another one from "Sproutmaster"...which is also not Dishwasher safe.

You can see that it has perforation along the bottom, like the above try does.  However, the tray is very study, and you can put a divider in (see above) to sprout two types of things instead on one in a single tray if you like.


After soaking your seeds, pour the water and the seeds directly into the tray.  The water will rush out the bottom and your seeds will stay in the tray.


Rinse your seeds, place the tray on one of the "lids"


 Place the other lid on top.


You can also stack them.  If you look closely, there are really 3 "lids" here.  One on the bottom, one in the middle, and one on top.

The Sproutmaster costs over $10.00 a tray, and you usually can purchase them in packs of 2-3 trays.  Again, they are not dishwasher-safe, so clean them by hand.  I soak mine in hot soapy water, and use a brush to clean them after they soak.  I also let them air dry.

There are many other trays you can purchase.  Some even come with a pump to automatically spray water over them.  So, the choice is yours.  No matter what, try sprouting, don't wait.  Do it RIGHT NOW!

Tuesday, May 11, 2010

Where do I get seeds to sprout?

Yes, another great question.  Here are some of the choices, and I will save my favorite for last.


These are actually from my Food Storage.  As you can see, some come in bottles, some in pouches, and some in bags.


These come in Zip-lock Mylar bags.  This is the variety that you get from Emergency Essentials (http://www.beprepared.com/).


Here are other ways to purchase them.  On the top, these are seeds in little bags that are often hanging in indiscreet places within a Health Food store.  I have found them in the produce section, sometimes on an end cap, and other times in a place that appears random to me.  You can also see Lentils and Beans....in the bag from the grocery Store.


Doesn't this look like a mess?  However, this is not only the least expensive,  but also my favorite way to purchase seeds.  Please know that I don't store them this way, but I wanted to make a point here.  These are seeds from....are you ready.....the bulk aisle in the Health Food Store.  They often have bins that you can dispense yourself.  After you get the amount you want, you write a number on the little twist-tie and that's it. Take it to the check-out counter and purchase the seeds.  This is not just a Utah thing. I have traveled to other states and purposely looked for this option in Health Food Stores....and the bulk bins have consistently been in each store.

Let me just tell you, this is the least expensive way to get your seeds.  If you compare ounce for ounce to most of the bottled and bagged items, these are considerably less.  Not everything comes in bulk, so this is why I have other options as well. 

One other piece of information, all of the stores that I have "checked out" do not pack these seeds with Oxygen Absorbers. There is a bit of controversy in the "food storage world" about using Oxygen Absorbers with sprouting seeds.  I have talked with the owners or management of 3 different producers of Sprouting seeds. They all consistently have stated that they either pack their seeds in Diatomaceous Earth or nothing at all.  They state that the Oxygen Absorbers can kill the germ of the seed, and thus it will not sprout.  So, for those who disagree, that is fine.  I have chosen to heed the advice of these professional seed producers. In the event of an emergency, I choose not to gamble as to whether my seeds will sprout of not.  This is the choice I have made. 


In the bottle/bag form I have Radish and Broccoli seeds, Fenugreek, etc.  If I had to make a salad just from sprouts, I would love these other flavors in it...wouldn't you?  So, make a trip, and see how every inexpensive it is to purchase from the bulk bins and to learn about other options that are available in your area.  Also, consider getting a wide variety, man cannot live by one sprouting seed alone!

What in the world would I sprout?

This is a great question....because there are so many options.  Initially, I was overwhelmed with the number of choices as I was studying this topic.  There is so much more than Alfalfa Sprouts! So, to help you a little, and to familiarize you with what some of the choices look like....here is a little pictorial tour.  Don't be concerned if you haven't heard of some of these....no worries....just learn what your choices are.


This is Pro Vita Mix, which is a commercial blend.  It has Adzuki Beans, Peas, Lentils, Mung Beans, Tritcale,Wheat, and Fenugreek.


Soy beans


Buckwheat.  This grows to be quite tall in just a few days.


You have heard of bean sprouts haven't you?

It's not just for bread....


A very small and delicate seed


My apologies for the handwriting...long story.  However, these are really delicious when sprouted.


Yes, awful handwriting again....but here are green peas. They are good in Salads. 


You have heard of this one...


Another delicate grain.


Most of you should have some of this available to you...


This is what "oats" look like before being rolled or cut.


This is also delicious in making salads

Very similar to Wheat

This is not an exhaustive list, but it gives you some ideas of the things you can sprout.  More on where to get seeds and grains to sprout in a later post.
01 09 10