
You may be wondering why I would think this is a good thing to do when Yogurt is relatively inexpensive at the Grocery Store. Well, let's take a look at it.
Originally, I was wanting a recipe to make yogurt at home as the Rooster of the house eats 2 servings of Raspberry (and it has to be Raspberry) yogurt every day. So, you can see that this is a common item on the shopping list.
When I began to research it, most recipes call for fresh milk and a few have fresh milk with some added Powdered Milk. Since Powdered Milk is a staple in Food Storage, I was looking for a recipe that would use this instead of fresh milk.
Peggy Layton has amazing cookbooks that she publishes. I looked at 2 recipes that she published for making yogurt in two different books authored by her. In the first book
Cookin' with Powdered Milk (copyright 1994), she suggests using Instant Powdered Milk. In
Cookin with Home Storage, (copyright 1998), she suggests using "dry milk". A third recipe by Ms. Layton recommends non-instant Powdered milk, flavored gelatin, and evaporated milk. I tried the 3rd recipe, and it set up about half-way. Please know that I could have unknowingly done something wrong when following her recipe., but it just didn't work when I tried it and I only tried it one time.
Well, I was pleased to see a post on
http://preparednesspantry.blogspot.com/. It was entitled
Yogurt & Cream Cheese Using your Powdered Milk (Post dated 7/2/09, submitted by "Lynn" from Canada). Aha! I thought, maybe this is a recipe I can't mess up! So...I tried it (see below) Since the recipe is posted online already, I will list the recipe here:
YOGURT BY THE GALLON
Ingredients:
4 Cups Dry Milk Powder
4 Quarts Warm Water
1 Cup Starter (buy plain yogurt from the Grocery
Store)
Optional compliments (freeze-dried fruit, jam, vanilla
etc)
Preparation: Mix the milk powder with the water in a blender until smooth. Heat mixture to a scald over stove top in large pot or in a crock pot (not too hot or it will kill the yogurt's live culture). Watch so it doesn't burn if you are doing this on the stove top. Cool to room temperature (lukewarm to the touch with your finger in it counting to 10. Or if you have a thermometer...till it reads about 120 degrees F).
Add the following and mix well: 1 Cup starter (plain yogurt or freeze dried yogurt starter or saved yogurt from your previous batch - this needs to be renewed after a month or the taste becomes sour).
Put into a gallon glass jar with a lid and place in some kind of hotbox (wonder box or thermal box) in a warm room for 12- 14 hours until thickened. If you don't have a hotbox, leave it in your crockpot, unplugged, and wrapped in a large towel to keep warm. You can also put it in a cooler wrapped in warm towels.
Once thickened: Refrigerate up to 12 hours. May need stirring before use. It does thicken more as it is refrigerated. You may add freeze-dried fruits, jam, or a bit of vanilla for flavored yogurt. However, remember to set some plain aside first if you are going to use it as a starter for the next batch. Hint: Freeze your remaining purchased plain yogurt in ice cube trays to have on hand for the next batch's starter when needed. Good for 6 months in the freezer.
I decided that a Gallon would be way too much for our family. So I cut the recipe in half. Well, here is how it went for me:

I choose to use jelly jars to put the Yogurt in as this is about the same serving size as the purchased yogurt containers. I put the jars in my dishwasher and sterilized them.
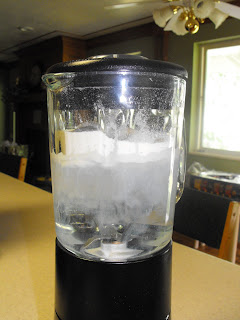
As per the instructions, I mixed the milk in my blender. Be careful not to make it "foamy", just stir it.

I put it in a pan to scald the milk and I watched the thermometer. When the temperature had been reached, I let it cool in the pan.

If you remember, only "Raspberry" yogurt is eaten in our home, so I put some of my Raspberry Jam in the jars. I have seen video's where the jam is carefully spread along the bottom....I figure it will get stirred up in the yogurt when it is eaten, whether it is on the bottom, or sort of on the bottom.

I used a funnel to put the milk solution into the jars. I put on lids (which do not have to be new. This is a great way to recycle your lids....just make sure they are very clean) and the rings.
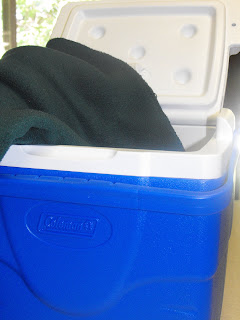 I took a fleece blanket and put it into a cooler.
 Place the jars into the blanket lined cooler. Cover with the blanket and close the cooler. Keep the Yogurt in the cooler for 12-14 hours. I did this in the morning, and by the evening, I was able to remove them from the cooler.
 I tilted the jar when I was taking it out of the cooler to see if it had "set up". It had.
 I then put the jars in the Refrigerator. I left them there overnight.

Here is what it looked like when I opened the jar about 12 hours after putting it into the refrigerator.
So....what did the Rooster think? He said it was very good, but it tasted a little different than purchased Yogurt. Perhaps this is why many of the recipes suggest putting a little Jello powder in the mix. It helps color the yogurt as well as flavor it. I will be trying that next time.
How much does it cost. I figured it cost just under $.17 per container (1 cup) as compared with $.50 to $.69 cents for a similar sized container at the grocery store.
Finally, I am glad to know that I have a recipe that I didn't ruin! It really worked and really only took minutes to make. The hardest part for me was waiting for it to be done! Those of you who know me realize what a challenge waiting is for me!
TRY IT TODAY:)


