Showing posts with label Bread making. Show all posts

Sunday, June 22, 2014

Yummy, Delicious Focaccia Bread....from your Pantry!


I love to use my Food Storage Staples for a Sunday meal.  With the exception of the Fruit Salad, the rest truly did come from....my Pantry and my Freezer.  For this post, I would like to focus on making Focaccia Bread.  


I love making this, because the hard work is done in my Bread Maker.  I mixed up the Little Caesar's Pizza Dough recipe in my Bread Maker on Saturday night. I put the dough into a Ziploc bag and placed it in the refrigerator overnight.


The dough is very bubbly and light.  I lined a large cookie sheet with Parchment Paper.  


Next, brush a layer of Olive Oil on the Parchment Paper.  This keeps the bread from sticking to the paper.


Essentially, you dump the dough out of the bag on to the oiled parchment paper. With your fingers, stretch the dough out evenly. This amount of dough covers about 7/8 of the sheet.  Set her timer for 5 minutes to allow the dough to rest once you have stretched it in the pan.


Press your fingertips randomly into the dough.


Drizzle more Olive Oil on top of the dough and brush it all over the top.


Although this does not look beautiful, it is actually Italian Seasoning sprinkled all over the top of the dough.


Then, sprinkle Kosher Salt over the top as well.


Lastly, I shredded Parmesan Cheese over the top of the dough.  You can you the shredded type in the jar as well.  I just love the taste of freshly grated Parmesan Cheese.


Bake the bread in a pre-heated oven at 350 degrees.  Bake from between 15-20 minutes until it is done.


Remove the bread from the oven and allow it to cool.  Once it is cooled, slice it into generous squares.


For our meal today, I sliced the bread squares in half.


Today, I made Shredded Beef in my Crock pot. I placed some between the pieces of Fococcia Bread.....it looked great!


And with that, dinner was served.

What is the take-home message?

  • Food Storage staples do not need to be .....boring!!!!
  • I had all the ingredients for the Focaccia Bread in my Pantry of in my Freezer (yeast).
  • I made the process easy on myself by using the Bread machine.
  • You can make this bread for sandwiches or as a bread for any meal.
  • Cost comparison:  The flour cost just under a quarter, yeast is $1.28, Sugar is $.12, Honey is $.07, Olive Oil is $.23, Salt $.11 for the basic bread. Total cost is $1.81.  I had Cut enough squares for 15 Sandwiches which works out to $.12 per sandwich for the bread only.
  • You can use white flour or have white and half wheat which allows you to use your whole grains.
  • This is just for fun. I hosted a shower with a "Princess theme".  Look at how fun this was!  I cut the bread into Castle shapes!
     
Using your Food Storage Staples is convenient. I say this all the time, but I think it bears repeating. 

I encourage you to try it soon!  Let us know how it worked for you!


Sunday, November 27, 2011

Using your Sun-dried Tomatos...


This may look like a Thanksgiving Dinner....and in a way it was.  However, it is the dinner I cooked for our Young Single Adults for a Family Home Evening. Since many of them are far from home, I decided to make a version of a Thanksgiving Dinner for them...which was done about a week before the actual event.

I wanted to share something that I learned from my sister, Dyana D.  This is her idea...and it is really, really good. I used my Sun-dried Tomatos that I had dehydrated myself.


They don't look lovely, but I cut  up the tomato into small pieces. In this state, the tomato is dry.  (When I want to make soft Sun-dried tomatoes, I put them into a jar with Olive Oil for several days before using).


Put the pieces into the melted butter.  (I found that it worked better to put them into the bowl with the sticks before you microwave the butter for about a minute. They got softer more rapidly).


Drop in your roll (in dough form)


Here you see that I have lined my sheet with Parchment Paper.  I have become a believer in this as it not only makes clean-up faster, but it gives the bottom of the rolls a nice color and texture.  Put your dipped rolls on a cookie sheet to rise.


Lay a sheet with plastic wrap over the top of the rolls.  Spray with vegetable spray.  Then lift the plastic wrap off and turn it over.  Place on top of the rolls.  Do not wrap it tight. The vegetable spray allows the rolls to rise and 'slide' under the plastic wrap until you are ready to bake them.


Here is the finished product. After they came out of the oven, I again sprayed them with the vegetable spray. After cooling off, I placed the plastic wrap back on them to keep them soft until I was ready to serve them.


So, you can see the basket of rolls on the buffet.  I can tell you that they went fast and many of the young men took extras home.....along with some homemade jams.

So, try this next time you make rolls.  They are delicious and everyone thinks you have really done something spectacular. 

Happy Eating!


Sunday, August 14, 2011

Baking...In My Grill.....Really!

Well, I have been fortunate enough to have double ovens in my home.  They are really great when you are trying to feed an army or two.  However, they have decided to die....and I feel like I have lost a dear friend. 

I have been a bit frustrated by this.  We do plan to replace them.....but I will be paying in cash and need a few more weeks to have the funds saved.  So, I decided to see this as an opportunity. 

A couple of years ago, I featured a post on emergency baking.  So, I decided to experiment on the word....that I had posted.

The Information is from the "Preparedness Pantry".    I re-read it and tried it.  I made a favorite Whole Wheat Bread recipe in my Breadmaker (yes....I am that 'lazy'). 


One of my big complaints is that when I bake any breads is that the bottom doesn't always want to willingly come out of the pan.  So, I now help myself by placing a liner of parchment paper at the bottom of the bread pan. Here, you can see that I traced the pan onto parchment paper. I cut the liners out with my scissors. 


As the paper curls from being on a roll, I sprayed the bottom of the pan with a vegetable oil spray.  It acted as a type of adhesive for the liner.  I then sprayed the sides of the pan as well.


Using my new tool (that I bought recently), I divided the dough into to two pieces.


I shaped the bread into two loaves and put them into my mini loaf pans.  I covered them with a towel and let the dough rise.


After the dough had risen, I preheated my grill to 350 degrees.


I placed the loaf pans inside another pan.  According to the instructions from Preparedness Pantry, the 2nd pan helps protect the bottom of the bread from burning.  I placed the loaves on the 2nd shelf away from the flames.  As you might imagine, when I opened the grill there was heat loss.  I adjusted the burners to bring the heat back to 350 degrees.  I turned down the burners when we achieved that level and watched for several minutes to try to ensure that the temperature was maintained.


After 30 minutes (the cooking time recommended for my recipe), I went to get the bread.  Here is an important lesson that I learned, the heat rose to over 400 degrees by then, so the loaves were a bit scorched on the outside.  I will check the temperature more often when I try this again. 


I took the bread out of the pans and placed them on the cooling racks. I sprayed the loaves with the vegetable oil spray and covered them with a towel to cool.   I retrieved the parchment paper from the bottoms of the loaves.  Here is what one looked like.


After the bread cooled, I sliced one of the loaves.  The bread was moist and cooked all the way through. I quickly took some photos because I wanted to try a slice.  The butter melted quickly and the taste....was fabulous.

I certainly would do this again.  It is not difficult, but I realize that I will need to do some baby-sitting with the temperature when I repeat this procedure.  The application of this procedure should not be lost on you:

  • This is a fun thing to do with your family...and certainly is not hard.
  • In an emergency, you could bake with your grill....and it would be delicious and comforting.
  • It is also something that you could do in the summer time if you don't want to heat up your kitchen.
  • Finally, you can use any recipe that requires baking in this manner. Can you see the possibilities?
Now, Try It!!!!  You Can Do It!!!!

Sunday, June 6, 2010

Focaccia Bread.....Yum.....


Since we are finalizing our focus on White flour, I am including another idea that you can easily make with your Food Storage staples.

In a previous post, I included the "Little Caesars Pizza Dough" recipe.  Here, I taking advantage of making that dough, which I made ahead of time in my bread maker.  I'm am telling you, this is delicious and easy. My thanks goes to my sister, Dyana D, who gave me the idea. 


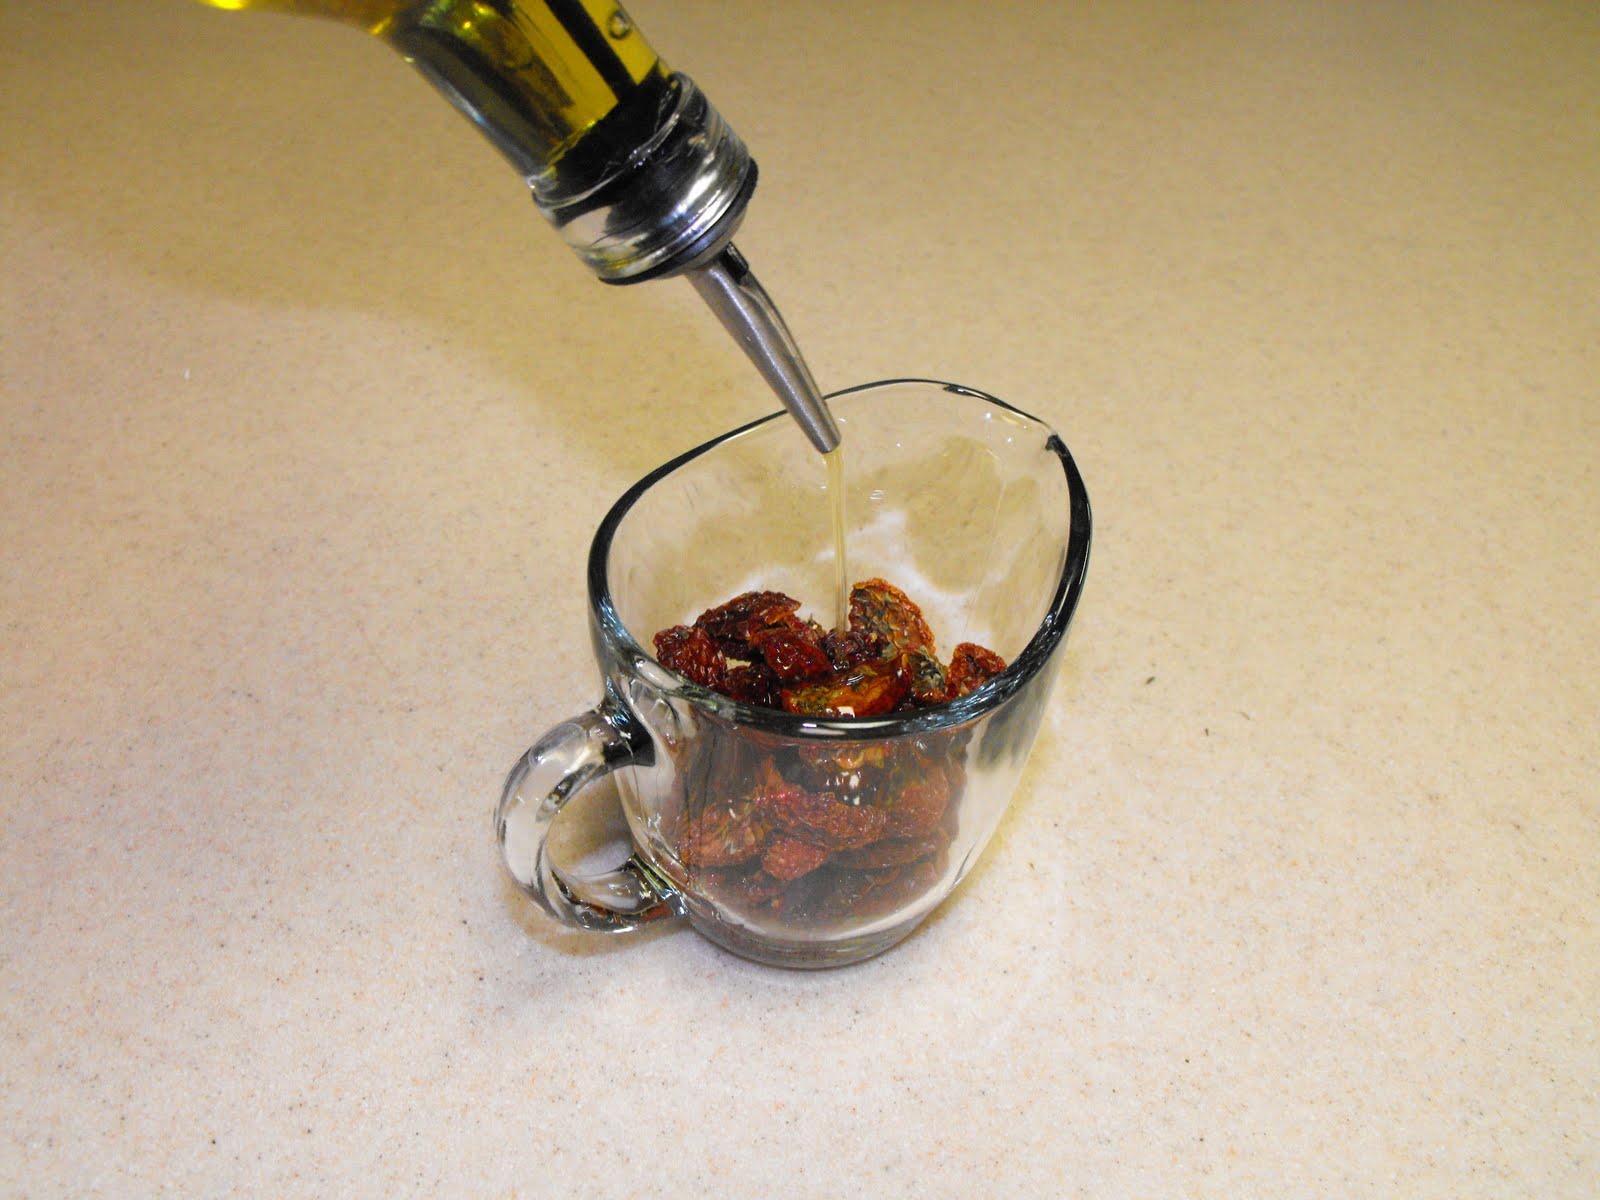
Last summer, I dehydrated "sun dried tomatoes".  In the post that I did about them, I noted that I would only soak them in Olive Oil just prior to using them because I didn't want them to go to waste in the refrigerator.


I made these with Cherry Tomatoes, and am adding the Olive Oil to soak them in.


My sister instructed me to put the dough in the refrigerator over night.  This is how it looks after taking it out of the refrigerator.


I don't have a pizza stone, but I do like this pizza pan.  Drizzle Olive Oil on the pan.  As you can see, this pan is perforated, so I have waxed paper underneath to make for easy clean-up.


I just let the dough slide out of the bag on to the pan.  I pressed it our a bit with my finger, and then flipped the dough over and did it again.  This way, the dough was coated with Olive Oil.


After I pressed the dough into the pan, and let it rest for about 5 minutes, I came back and pushed my fingertips into the dough.


This is what it looked like afterwards.  The indentations are to capture the yummy toppings you are about to put on top.


Yes, brush on more Olive Oil.  I used the oil my tomatoes had been soaking in and brush it on the dough.


I then placed my sun dried tomatoes on the dough.  (The next time I do this, I will dice them up into little pieces.  I will also press the pieces into the dough so that some of them do not pop off when they come out of the oven).


I got out my Kosher Salt.


Sprinkle some on the top of the dough.


Sprinkle Parmesan Cheese all over the dough.


Bake for 15-20 minutes.  This is how it looks right out of the oven.


Serve hot, or at least at room temperature.  I promise, your kitchen will smell wonderful and it most likely will not last long.


Lessons to be learned


  • Every ingredient used to make this was in my food storage.


  • I could slice this bread and make sandwiches with it.  Think about specialty sandwich shops, they offer this type of bread.


  • It did not take long to put the toppings on, less than 5 minutes.  Don't let time be a barrier for you...this is very doable. 


  • I did not have to run out and get anything special...but I made something very special.  Be creative.


  • Search the Internet for recipes of the foods your family loves and also that you would like to try.  Food Storage can be so delicious, that you family does not realize that this what they are really eating.


Try it....really, you won't be sorry!

Thursday, April 29, 2010

Dig out that Breadmaker....you know where it is!


I realize I am about date myself.....but do you remember when everyone just had to have a Breadmaker....machine?  All the hype about having homemade bread when you woke up in the morning to having fresh bread for dinner?  For me, I told myself that I could use my food storage staples more readily if I had one.  Well, I did use it, and burned out my first machine.  This is my second one.....and this one has seen more of the inside of the cupboard than the countertop.  I don't have a really good reason why.

Well, since we are focusing on Yeast, I knew I had to dig this beast out of the darkness of my cupboard, so I did.  When I got home from work, I had a quick dinner, but knew the Rooster of the house would be coming home in a couple of hours.  I decided to either make bread....or something from the dough.  I decided upon scones....which are very easy.  I only had to use the "dough" cycle.

In case you have never done this, pull out the manual to your machine and find the recipe for bread. You can use white or wheat bread recipes.  Mix it, and allow it to rise, again on the dough cycle.

Heat ~2 inches of vegetable oil on the stove.  Have a dish nearby with a lid to put the hot scones in.  I place a folded paper towel at the bottom of the dish to catch any excess oil.


Pull a small amount of dough from the ball.  Flatten it.


Place it in the hot oil.


Turn it over when golden brown.

Retrieve the scone with tongs and allow the excess oil to drip off into the pan.

I set a place for the Rooster complete with butter, syrup, powdered sugar, and two types of Jam.   I'll bet my son, who didn't want "anything", will surface to help his Dad eat all of these scones!

Now, it didn't take me any real time to put the ingredients into the Bread Machine....and the machine did all the work.  I cooked a few scones, which took about 10 minutes, and it was all ready!  Since today turned out to be a snowy day outside .....and it is the end of April, this seems liked an appropriate hot meal to be having in celebration of our wacky weather!

Remember how delicious scones are?  Try them soon!
01 09 10